
Texture draping
Drape a satellite image, map or land cover image over the terrain, place it with a world file or GeoTIFF georeferencing, and blend it with other colourings.
You will learn
- Drape an image over a terrain layer.
- Place it geographically with a world file or a GeoTIFF.
- Blend the image with elevation or slope colours.
Prerequisites
Data for this tutorial
Sample valley DEM (synthetic) Download orbis3d-sample-valley.tif
- Format
- GeoTIFF, 1 band, Float32, Deflate, tiled
- CRS
- EPSG:32643 (WGS 84 / UTM zone 43N)
- Content
- Elevations 419.5 to 1452.5 m; NoData -9999 in the south-west corner
- In Orbis3D
- Data panel ▸ Sample data ▸ Sample valley DEM (synthetic) ▸ Load
- Licence
- Synthetic, CC0 1.0
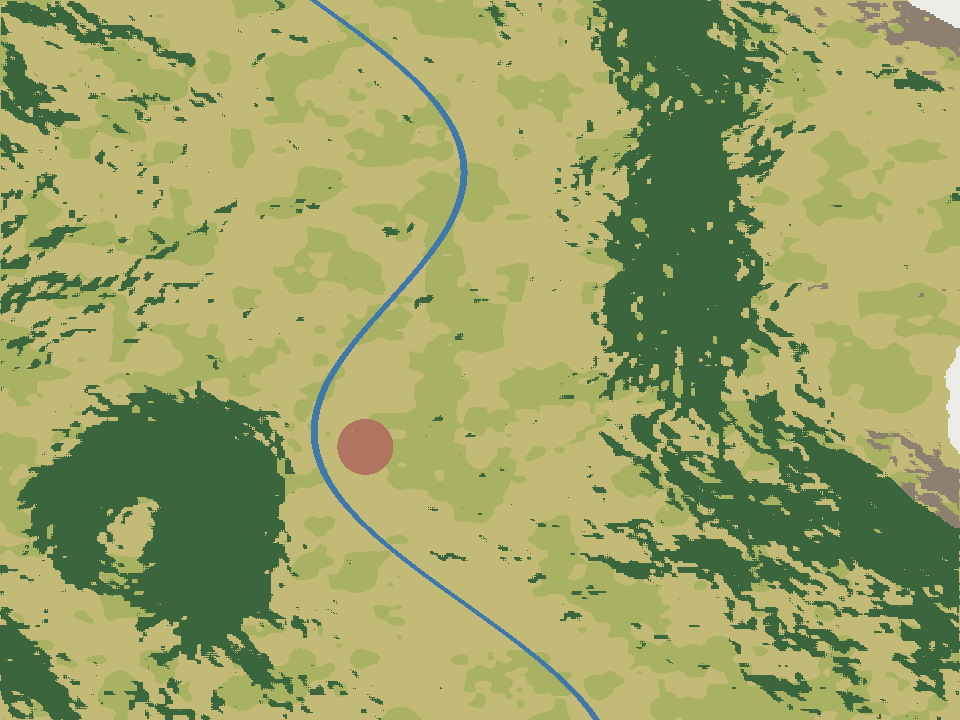
Sample land cover image (synthetic) Download orbis3d-sample-landcover.png Download orbis3d-sample-landcover.pgw
- Format
- PNG (RGB) with world file (.pgw)
- CRS
- EPSG:32643 (same as the valley DEM)
- Content
- 960 × 720 pixels of 15 m: fields, forest, rock, snow, settlement and river
- In Orbis3D
- Data panel ▸ Sample data ▸ Sample land cover image (synthetic) ▸ Load
- Licence
- Synthetic, CC0 1.0
Synthetic samples are CC0 1.0; the SRTM sample is public domain. About the datasets
The task
You have a land cover map of the sample valley as a PNG with a world file, and want to see it on the 3D terrain.
Steps
- Load the sample valley and keep it selected in the Layers panel.
- Drape the image in one of these ways:
- Sample: Surface ▸ Texture draping ▸ Sample land cover (shown for the sample valley).
- Your own files: Surface ▸ Texture draping ▸ Drape image…, the image button in the toolbar, or Layer ▸ Drape image on active layer…. Select the image and its world file together.
- Drag and drop: drop the image and its world file onto the viewport. Images are draped on the active layer.
- Read the note in the Texture draping section. For the sample it says the image was placed with orbis3d-sample-landcover.pgw and that the world file is assumed to use the DEM's coordinate system.
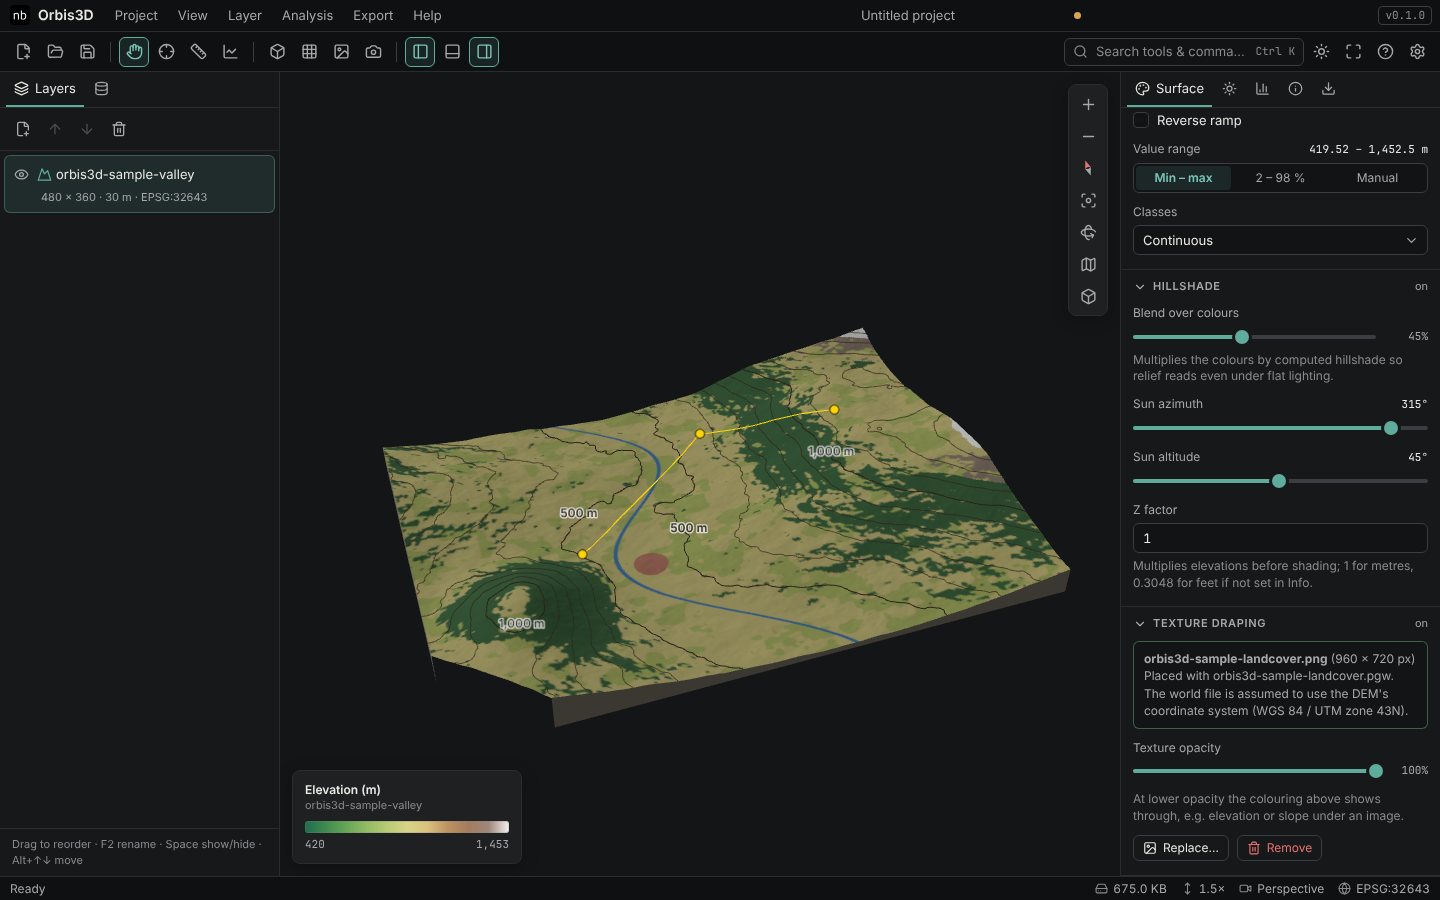
- Lower Texture opacity to let the colouring underneath show through, for example elevation or slope at 50 %. The hillshade blend still shades the image.
- Use Replace… to drape another image and Remove to take it off.
How the image is placed
| What you drape | Placement |
|---|---|
PNG, JPEG or WebP with a world file (.pgw, .jgw, .wld, …) |
At the coordinates in the world file, assumed to be the DEM's CRS |
| RGB or RGBA GeoTIFF in the same CRS as the DEM | At its own coordinates |
| GeoTIFF in another CRS | Stretched over the DEM extent, with a warning (Orbis3D does not reproject images) |
| Image without georeferencing | Stretched over the DEM extent, with a warning |
Parts of the DEM outside the image keep their normal colouring. Images larger than 8,192 pixels on a side are reduced to fit the graphics memory; the world file is adjusted accordingly.
## Expected resultThe river, forest, fields, rock and snow of the land cover image lie on the matching landforms of the valley. The drape is included in PNG captures and in GLB, glTF and OBJ exports as part of the texture.
Common mistakes
- World file not selected. Without its world file the image is stretched. Select or drop both files together; they must share the base name.
- Different coordinate systems. A world file in another CRS places the image in the wrong place. Use an image in the DEM's CRS.